Tuesday, March 15, 2016

Balboa Park: 100 Years Of Fun And Learning.


2015 was a very special year for Balboa Park, it marks the 100th anniversary since its opening.  Located in the heart of San Diego is one of our favorite family friendly attractions, which while living in San Diego we frequently visited. Now that we live in Northern California we try to visit a couple of times a year while visiting family.


To give you a little bit of background the park existed back in 1872, however it was more of an open space with wildflowers and wildlife. It was until 1909 that the San Diego Chamber of Commerce suggested and began working on the park to prepare it for the Panama-California Exposition. The Panama-California Exposition was a celebration of the opening of the Panama Canal and was meant to place San Diego as the first U.S. port of call for ships traveling North via the Canal. 


Fast forward to 2016 and Balboa Park is now home to 17 museums, 19 gardens, over 60 miles of hiking trails, and home to the world famous San Diego Zoo. We've shared about all several of our places to visit in the Park, but we wanted to share a small list of what to see while visiting. 


Mingei International Museum, is a Museum like no other as it collects and exhibits arts of daily use. On exhibit you will see traditional cultures from the past and present. The Museum is host to Family Sunday's on the second Sunday of each month. Inviting families to explore their exhibits and learn to create art. It is perfect for an afternoon of fun and learning. We've been there twice fro Family Sunday and several other times to explore their exhibits. My favorite display has always been on the one on the ceiling, reminds me of an artful angel ready to spread love, joy, and kindness. 


The Botanic Gardens at Balboa Park, are one of the most photographed building on the park, perhaps it has to do with the Koy pond out front of it or the lush green plants on display inside. On a hot summer day, it's the perfect spot to cool down. On any given day, you will feel as if you were transported to a jungle. During the holiday season it is home to a beautiful Poinsettia display. During our visit we saw several species of orchids, aren't they beautiful?


The San Diego Natural History Museum aka The NAT, you can expect to learn about the biodiversity the San Diego and Baja California region has to offer, the changes in the land and how the land meets the ocean. The last time we visited we enjoyed a special traveling exhibit on gemstones and jewels back in 2012, it was amazing. At the NAT you may also enjoy a documentary in their giant screen theatre, one in particular I look forward to seeing on our next visit is the Whales.


San Diego Museum of Art, an amazing museum with art from around the globe. During our most recent visit in January we were able to enjoy the exhibit on The Art of Music, it was truly amazing to see how music has an influence on artists from past and present. We got to enjoy paintings from Botero, Matisse and there was a station for guests draw while listening to jazz music. We enjoyed this exhibit very much.


San Diego Zoo, one of our many visits to the San Diego Zoo I remember meeting some tourists from Spain. They mentioned that when they first planned out their trip to California, they researched on places to visit with their family after said research the first item on their travel plans was the San Diego Zoo. What made the San Diego Zoo a premier choice for this family of tourists as many guests -us included, is the effort that San Diego Zoo makes to not only have animals from around the globe on exhibit, but also teach guests about conservation and how we can help to preserve wildlife. Are you planing to be in San Diego during the summer? If so, consider visiting the Zoo for its annual "Nighttime Zoo" event; during the evening/nighttime there are less crowds, it is cooler and most importantly most animals will be more active. 

International Cottages {House of Pacific Relations}, oh the places you'll go without having to leave San Diego. It is best to visit on a weekend when most if not all cottages are open. You will learn about other cultures and countries, such as Finland, Israel, Puerto Rico, Mexico, Denmark, Ireland, and many more. There are 32 cottages in total representing different nationalities, there is always something fun going on. Inside each cottage you will learn how people from each country live, as they're decorated according to the culture they represent. Amongst our favorites are: the house of China, the house of Israel, the house of Denmark, and the house of Finland. 

Reuben H. Fleet Science Center aka The Fleet, a fun and exciting museum in which you are mostly hands on with most if not all the exhibits while learning. While my kids were toddler we'd often visit the little city they have on the second floor. Most recently we visited to view a movie about Jerusalem in their IMAX theatre. 

San Diego Air and Space Museum, during our last visit we enjoyed this museum the most. My son has grown with a passion for all things transportation and appreciates all there is about space too. This museum has an exhibit on the history of flight, it's amazing to see what the first aircraft looked like compared to what airplanes look like now. Also a trip down memory lane in regards to the amenities that airlines used to offer their customers through the years, remember when flying was a luxury in the sense that you'd get served your meal in real porcelain or ceramic plates and real silverware not disposable ones like nowadays? The kids section is also fun, with games and experiments that teach you about flying, gravity and more. 


While visiting Balboa Park, make sure you enjoy a nice meal and lovely view at The Prado. Anytime during the year, request to be seated in their outdoor patio it is truly peaceful. With a small water fountain in the center and awnings you will feel as if you were in paradise. They have a children's lunch menu with great options from a salad to chicken fingers, grilled cheese sandwich, fish tacos and more!  Pictured above is the Marinated Skirt Steak Panini it has a delicious chimichurri sauce and house made garlic-shallot roll, it is perfection and I highly suggest you try it. 

Tuesday, March 8, 2016

Tips From A New Runner


The past couple of months have been about running, working on my endurance and setting a better PR -that's Personal Record. I have been learning from avid runners what to do and what not to do, I have a better idea of what I should be eating and what will help me reach a better PR.

I've learned to listen even more to my body, in order for one to achieve what we want our bodies to do we need to be in tune with them.  Here's a list of what I've learned that works for me and may work for you too:

- 8 hours of sleep per night is a must, it allows my body to recharge and prepare for the next day even if it's a rest day.

- Eating before running gives me more energy, in fact when I've ran without having a small breakfast I end up having reflux and have to stop continuously or run uncomfortably.

- Eating a balanced diet lets me run smoothly without feeling the need to gasp for air.

- Dressing appropriately for the weather is best. For the past 2 years we were in the tropics which means that our wardrobe consisted of mainly summer clothes. Now, we live in cooler temperatures.  I've run in 39ºF temperature and it was truly uncomfortable. My legs felt stiff and my cheeks, lips and hands were numb which is why my family prepared me even more for my runs with weather appropriate attire and I've felt more comfortable running or taking a walk in warmer clothes.


- My lips have been burning from how dry the air feels, I've tried several lip balms and ended up going back to Burt's Bess my preference is for the pomegranate one but recently tried the grapefruit one. They both work on my lips. 


- I recently read that you should change your running shoes every 300 miles or 6 months. At first I will admit I thought it was a marketing ploy to get us to buy new sneakers often, but the past couple of weeks I've noticed my right foot keeps bothering me to the point where I end up taking brisk walks and just maybe it could mean it's time for a new pair. I added up all my miles since I got this pair in Spring 2015 and although I'm not at 300, my shoes do need replacement and pronto.


- Hydration is key, as a high blood pressure patient that takes medications for to help control it I need to drink water while on my runs and my parents found the perfect running belt for me that has 2- 6oz water bottles and a place that keeps them safe on my belt plus there's a zip pocket for my phone, keys and whatever else I might need. It also helps to have my hands free of holding the water bottle. 

It's amazing how great one feels when working towards a goal and I've been working towards mine at my own pace. In running, just like anything else you shouldn't compare yourself and your achievements to others. Instead you should compare them to yourself a few weeks or months before. You will surely notice milestones and how far you've come.

Wednesday, March 2, 2016

Yalla Mediterranean

It’s been a whirlwind year, this weekend we celebrated our first year anniversary since we moved back to the Bay Area. It’s amazing how time goes by so quickly, specially when you are enjoying life. To celebrate our friends at Yalla Mediterranean invited us to try their new location in Fremont and of course we are thankful that we had this great opportunity.


Last Friday after school pickups, I surprised my kids with a visit to Yalla. As soon as we arrived we were all excited to try their delicious food, we had been following them on Instagram and had a general idea of what we’d order. 


First things first, we are a detail oriented family. This means we look at every single detail in our surroundings, from colors to textures to tastes; Yalla’s logo captured our attention. A simple slice of lemon and the name, to us this meant simple ingredients in a modern and clean restaurant. We also noticed the combination of colors in the décor: Yellow, teal and gray, looks perfect to us.


As we entered Yalla, we were greeted by smiling faces ready to cook our order. Wait a minute, did I say cook? Yes, I did. You see, at Yalla they prepare your meat, chicken and/or fish the moment you order it. First they ask what style you’d like, options are: wrap, salad or plate. We all chose plate style, which comes with 3 sides for adult portions and 2 sides for kids portion. 


I ordered the Chicken Skewers plate, this is all natural chicken breast that has herbs and spices served on top of Basmati Rice and seasonal vegetables –our server suggested to try the Spiced Lentils and they were delicious! a side of Moroccan Carrot Salad {carrots, cumin, dill, golden raisins, honey and greek vinaigrette}, Fattoush Salad {cucumber, olives, dill, red onion, green onion}, Israeli Cous Cous {cous cous, dried fig, dried apricots, almonds, parsley, scallions, fennel, olive oil, white balsamic vinegar}. Everything tasted fresh and was delicious. 


I should point out that all of their sides are Vegetarian and Gluten Free, some are even Dairy Free and Yalla only uses GMO Free ingredients. Every morning the Yalla team chops, dices, zests and spices 360 pounds of fresh produce, I absolutely love this! 

The kids’ menu is perfect for ages 10 and under, they have the same choices: Salmon or Chicken or Kefta Skewer, or Falafel. My kids ordered Salmon Skewer and chicken Skewer and liked it. It is served with Basmati Rice, Yalla Fries and 1 Yalla Side, and includes your choice of Organic Milk or House-Made Lemonade. 


The ambience at Yalla is casual, family friendly and even though your food is prepared and cooked at the moment you order, you are enjoying it within 5-10 minutes.  After our meal, we ordered dessert Greek Frozen Yogurt with chocolate sauce. 


My family enjoyed their food, the ambience and friendly team that were always smiling. In fact as we were leaving my kids asked if we could come back the next day to eat another delicious, freshly made dinner. As for me, I do plan on returning. The taste, temperature and quality of the service were fantastic. 

Special thanks to Evonna, she suggested I try the Beet and Kale Salad {roasted beets, kale, feta cheese and Greek Vinaigrette} it was so good and will be added to my faves for our next visit.  

We live 40 minutes from this location, but I did ask if they were planning on opening anywhere in the South Bay Area and was told that it is planed to happen in 2016 –yay!


*This is a sponsored post, all opinions, story and images are 100% our own.*

Sunday, February 21, 2016

Zootopia


We are just 2 weeks away from Disney's latest animated film Zootopia opening in theaters everywhere, and in case you weren't keeping track it's Walt Disney Animation Studios' 55th animated feature!

Here are some details on what this upcoming film is all about:

Zootopia is a city, inhabited by modern mammals. It has neighborhoods like the ritzy Sahara Square and frigid Tundratown, it is where animals from every environment live together. It's a place where you can be anything, but when rookie Officer Judy Hopps (voice of Ginnifer Goodwin) arrives, she discovers that being the first bunny on a police force of big, tough animals isn’t so easy. Determined to prove herself, she jumps at the opportunity to crack a case, even if it means partnering with a fast-talking, scam-artist fox, Nick Wilde (voice of Jason Bateman), to solve the mystery. Walt Disney Animation Studios’ “Zootopia,” a comedy-adventure directed by Byron Howard (“Tangled,” “Bolt”) and Rich Moore (“Wreck-It Ralph,” “The Simpsons”) and co-directed by Jared Bush (“Penn Zero: Part-Time Hero”).


This is probably my favorite clip from the movie, probably because I know how slow sloths are and have seen them in the wild. They really are slow! We are excited and can't wait to see Zootopia. Follow all the Zootopia fun on Facebook, Twitter, and their official website. Zootopia opens in theaters everywhere on March 4th! 


And to celebrate it's upcoming release, I'm happy to share with you some coloring pages of Officer Judy Hopps and friends. 


Wednesday, February 10, 2016

Hey, remember me?


Happy New Year!

It's been a while since I last posted something new. It's not that we haven't done much, it's more like we've done a lot. In the past 3 months we've traveled to visit family, dealt with family health issues, been busy with volunteering at schools and getting to know more of the area we live in as well connecting with new friends. I have continued to be active on Facebook, Instagram and Twitter. Hopefully you are following there me too, as I post several times a week on there. 

As the year began the area we live in was hit by several rainstorms caused by the "El Niño", which meant that in January I barely got to go out for my runs or take brisk walks. 

This month, began with sunny skies and we've even broken high temperature records something that has my allergies acting out. I am enjoying the sunny skies to take walks. When you stop running for over a week it's as if you lose your momentum and your speed and then again for someone as new to running as me you basically start building up to where were and that is what I've been doing since February 1. 

In fact, as of February 1st, I have set my first walking goal on Runkeeper and that is to reach 50 miles in February. It sounds easier said than done though, considering our area will have a week off from school and I don't usually take my runs/walks on weekends to enjoy my family to the fullest. I am optimistic that I will achieve it though.

Why did I chose 50 miles? For starters February has 29 days this year, so I figured if I were to run at least 1.72 miles per day all month long and of course being me that is not the case. Between volunteering at schools and other responsibilities there are days I don't make it to my run, so some days I'm reaching 3.5 miles others 2 and then there are days like last week when I reach almost 4 miles. 


I've chosen to reach 12.5 miles a week and last week I reached that goal. It was fantastic to do so, to share that feeling of accomplishment with my family and my body is feeling stronger with each walk. 

Playlist is key! Since I first began being active in 2012, I began creating my own playlists depending on what my mood could be. This year my playlists goes according to tempo and what I'm doing, for example when I run my playlist is mostly Calvin Harris with Ellie Goulding and faster music. For a brisk walk I sometime listen to some Spanish Urban music which is like Reggaeton or Bachata. For a slower paced walk I will listen to Reggae, Sade and Michael Bublé. 

Each person has a personal preference and for me these playlists have worked perfectly. There are times when during my walk I kind of want to just relax my mind and that is when I listen to instrumental music, to relax my mind and just breathe while enjoying the scenery. 

One more goal I set for myself, is that I want to try at least 2 new recipes each month. I have so many fantastic recipes on my pinterest board waiting to be made and slowly but surely I've been trying 2 -3 new recipes in January and again in February. Recently we tried a Rosemary, Butter, Garlic Steak that was simple to prepare and so delicious! 

Have you tried any new recipes you liked lately? I'm also planing our dinners for the week, this is great when you are shopping with a budget and also prevents the usual: "what should I make for dinner" dilema that I am very familiar with. This has also helped my not-anymore-picky eater be more open about what he eats. He's even eaten peas!!! I can't believe he is beginning to try new foods and is enjoying figuring out that when you try something new it can be a good thing. 

Well, I guess this update means I will be back to blogging... right? It's a start... Until next time have a great time enjoying what you do and being open to new adventures and connect with people in your life, because you never know what adventures your destiny holds for you. 


Thursday, October 1, 2015

Rajas con Crema {recipe}

One of our favorite Mexican recipes is called "rajas con crema" which is slices of pasilla {poblano} chile in a special cream based sauce. It is creamy and full of flavor, it is perfect as a main dish or as a side and it can also be a topping for meat or poultry. It will also work with fish. It is that delicious!


Served as a taco or added to your quesadilla mmm, so good! There are several ways to prepare them, some people add zucchini to them others add corn and hatch chiles... However you chose to serve them, I can guarantee you will love them as much as we do. Finding pasilla chiles in Costa Rica was always a challenge, we were only able to find them on 3 different occasions in 2 years. However, now that we are in California and can find any ingredient we need to prepare delicious home cooked meals we are enjoying them as much as we can. Here is how I prepare our rajas con crema, this week I served ours with a side of Mexican Rice, breaded chicken breast and beans

INGREDIENTS:

4 Pasilla Chiles {also called poblano peppers} 
1 Medium size yellow onion
1 Tsp Knorr Chicken Bouillon 
1 Tbsp Vegetable Oil
1 Garlic clove minced OR 1 tbsp of minced garlic
1 Can of Nestlē's Media Crema aka table cream
Salt and Black Pepper to taste

COOKING INSTRUCTIONS: 


1.- Charr pasilla peppers, this can be done by placing them over a gas flame or underneath the broiler and cook until they are blackened on all sides or placing them on top of a non-stick griddle and blackened on all sides {this is how I usually charr peppers at home}. It will look like the skin is bubbling. Then enclose them in a plastic bag -any plastic bag will do and let stand for 8-12 minutes. The steam from the peppers will make them easier to peel.


2.- Peel the pasilla peppers, take the seeds out and slice them into long strands. Peel the onion and cut into half, then slice the onion. You want the onions to look like crescents. Place a large skillet on medium heat and add oil.


3.- When the oil is hot, add the minced garlic and onions. Sauté for 3-5 minutes mixing constantly. Add the sliced pasilla peppers and mix all together. Add salt, pepper, Knorr seasoning and continue mixing. 


4.- Add Nestlē's table cream and combine all ingredients, continue mixing until all ingredients are combined. Cover the skillet and reduce heat to low-med heat, let cook for 5 minutes. Enjoy!


Tuesday, September 15, 2015

D.I.Y. Necklace Display

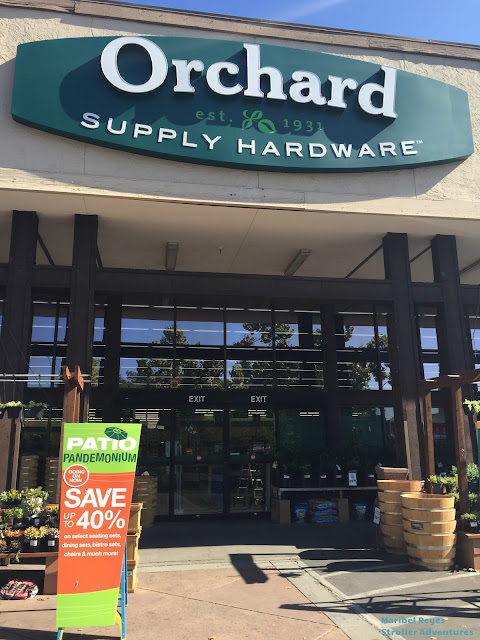
Disclosure: This is a sponsored post on behalf of Orchard Supply Hardware {OSH} they have provided me with gift cards to make an organizational project. However, all opinions and images are 100% my own.


Our family works hard on keeping our home organized, my grandfather used to say "cada cosa en su lugar" which translates to "each thing in its own place" it was his way of passing along his organizational skills. I can only hope to be as organized as he was though. 


Lately I had been having issues with my accessories, through the years I've accumulated quite a collection of necklaces and bracelets. My collection has grown out of the little trinket boxes I had them in for as long as I can remember. Not only that but moving around hasn't helped keep them at their best, some end up tangling so bad that as I work on getting them back to wearable condition they end up breaking. This time though, I wanted to create something to display my collection and  make it easier for me to find what I'd like to wear along with keeping them untangled. 

My mother has always had a beautiful necklace holder, but she has had it for as long as I can remember and I also wanted to have a place for my bracelets. Right before our daughter was born, my husband bought a lovely coat rack that had a shelve on the top and made it really functional for us, so I thought of creating something similar since I couldn't find a necklace rack with enough space for all my necklaces.


Lucky for me Orchard Supply Hardware {OSH} is just a quick 5 minute drive from our home and they have an amazing team that is ready to help make those ideas come to life. I explained to Flor {the Assistant Manager} what I was looking for and she along with Christina {she is an amazing woman that knows all about DIY and will show you how to get your project done} helped me figure out how to do my project, they took the time to show me where the ready made shelves were in the store. Which are a great idea, but I wanted to make my project a little more personal and be able to have the necklace display in a matching color to our bedroom's theme. Christina mentioned I could buy wood, OSH could cut it down to the size I wanted it at no extra cost. This was perfect, because I don't own an electric saw or any power tools. 

Here is what you'll need to make your own necklace display/holder:


Wood {mine measures 18" long x 3.5" wide, 1/2" thick}
Spray Paint Primer {This is to cover the woods imperfections}
Spray Paint {color of your choice}
Sanding material {there is sand paper, but we chose a sanding square it's easier on the hands}
Screws
Shelf brackets {for the size of shelve I made I used 3}
Cup hooks {one per necklace}
Tarp {to protect your project area from getting stained}
Gloves {to protect your hands from getting spray painted}
Face Mask {to protect from dust and paint chemicals}
Protective goggles
Nails
Hammer
Screw driver

Project Instructions:

1.- First things first: prepare the area you will be working at by covering it with the plastic tarp, it is best to work outdoors in the shade. We chose our backyard and since there was a bit of a breeze we help our tarp in place with large rocks, we protected our lawn from the spray paint. 

Then we placed all the items we would be working with on hand: sanding material, wood, spray paints. This made it easier for us to get what we needed without making a mess. 

Now onto safety, put your working gloves on as well as your safety goggles and face mask. *If you don't have safety goggles or they don't fit use sunglasses.


2.- Using the sanding material, sand all sides of the wood to make it smooth to touch. This will take roughly a minute per side. Don't forget to sand edges too, but not too much so the ends don't lose shape.


3.- Place wood on tarp on top of a rock or something to lift it up a bit and spray one side at a time allowing each side to dry for at least 15 minutes, covering it evenly and without spraying too much on it. When the shelf is fully painted, take to a dry indoor area {the garage works best} and allow it to dry for 24 hours.


After 24 hours of allowing paint to dry and set, follow these steps:

1.- Measure the shelf's length and mark where the brackets will be along with the brackets. I placed 2 brackets on each end and another in the center of my shelf for added support. I then counted how many cup hooks I'd need for all my necklaces and left 1" distance between hooks, but you can certainly place them closer. Mark where each hook will go.


2.- Hammer a nail for each screw and cup hook you'll be placing just 1/4 of each nail and pull out the nail immediately. This is to make space in the wood for the screws and cup hooks. Remember I said I didn't own any power tools, so this is how I was able to do my project by hand. If you own an electric drill then use it. 


3.- Place cup hooks using your hand, you just turn it clockwise and the cup hook should easily go into the wood. Now place each bracket into place on the shelf using the screws and screwdriver. Make sure all cup hooks and brackets are securely in place.


4.- Use a ruler to make a straight line as a guide to place shelf leveled on wall. Mark lightly with a pencil, mark with the pencil where each bracket will have a screw going into the wall. Using the bracket marks on the wall, hammer 1/4 of a nail into the wall to make space for the screws.


5.- Place shelf aligned with the line you made with the pencil on the wall, make sure it is leveled. Using the screwdriver, screw in each bracket. When done make sure the shelf is securely placed on the wall. Hang 1-2 necklaces per cup hook. For bracelets I chose small dipping bowls I had for them on my night stand and simply placed them on top of the shelf. 


And that is how you make your very own necklace organizer, for a more organized home. I have to admit this is my first DIY project that I did 90% on my own. My kids helped sand the wood and my husband helped me paint it the second time around. 


Here are a couple of tips to keep in mind, when doing this and other projects:


- It is best to follow the instructions on the can and to do this outdoors in a shady area when temperatures aren't above 90º weather. Let dry for the amount of time specific to your spray paint (it will say the suggested amount of time on the can). I read the instructions lightly, had my kids help me spray paint one side of my shelf and it was during the heat wave in California, under the sun. Of course my shelf's paint bubbled while drying due to the heat. 

- Make sure you wear the protective gear, I didn't put on gloves the first time around and accidentally spray painted my hands and it took 3 days to finally have it removed from my fingers and nails plus using nail polish remover. 

- I was able to screw in my necklace display to the wall because our walls are dry wall, if your walls are made of concrete or cinder block or solid wood then you will need a power tool. OSH has an electric drill kit for as low as $24.99 it comes with accessories and it is on my christmas list this year, because I know I will be doing more projects at home.

- Do you live in a rental? We do, so making holes on the wall can be a little unnerving considering rental agreements. Never fear, OSH has a spackle kit for as low as $8.99 with this kit you can repair and cover any wall. They will also show you step by step how to apply it. 

- One last tip, do not be afraid of giving this a try. If you don't want to paint your shelf you could always use decorative adhesive paper and cover the wood with it. ;-)

Disclosure: This is a sponsored post on behalf of Orchard Supply Hardware {OSH} they have provided me with gift cards so that I could make my project. However, all opinions, ideas and images are 100% my own.  

Thursday, August 27, 2015

Why I Run.


One foot in front of the other, pounding the floor or more like the sidewalk. 

"You can do this!"

"You got this!"

"Just 5 more minutes, pace yourself".

"Breathe in, breathe out... slowly".

...And you're done. You just ran for 45 minutes non-stop. You did it! You really did it. 

Remember how running fast for 2 minutes was all you could do? Remember, when you reached 7 minutes but nearly passed out after it? Yes, I do remember that. I was working on my time, but was really not doing it right. How do I know this? Last month while visiting family in Baja, my mother hired a family friend who happens to be called "Iron Woman" by all who know her to train me. She is a triathlete, she runs, she swims and she cycles. Her body is strong, confident and she is so inspiring. We began doing sprints, bodyweight lifting, TRX exercises and then we gave running a try. 

She saw me run and gave me great advice, not only that but she noticed how hard it is for me to walk fast. To run -for me at least, it takes a lot because my thighs rub against each other. My thighs in all honesty is where I carry most of my weight and it really isn't that easy. Lose skin plus fat plus movement not the best combination. However, I want to run. I truly do, I've been dreaming about it and attempting it since 2012 on and off. I will not give up, I have not given up on the idea because I know persistence all to well.


Two weeks ago my family and I decided we needed an outing at sunset, the kids and my husband geared up for a bike ride and me? I decided I was going to run, because I could. So I did. While they rode their bikes a few feet from me, I was struggling and hurting all over but I kept pushing. All I could hear was my mind telling me "you got this!" and so I did, one foot in front of the other. Others passed by us along the trail and some would smile at me, one man stopped and stared at me; I'm sure I know what he thought, but I don't like to assume so I continued to pace myself and when I felt I couldn't go any longer I set my timer so I would not keep thinking about how much I had until it ended and played some music, took a deep breath 1, 2 and 3 times. 

Suddenly the timer went off and 45 minutes had gone by, I did it! I got this!

55 minutes is the amount of minutes I can now run non-stop. Oh yes I am there. Today as I ran around the park I kept looking over at the benches in the shade, seemed tempting considering it was hot and I had forgotten my water bottle. I kept going, I promised myself I would go for a run and I did. I do not pay attention to what others say, yes I hear their comments but their comments just make me think how far I've come. They're just reminders of what I can do and where I want to be. I'm not the poster child for a runner, but then again I thought all you needed to run were legs and a will to do it. So here I am, yet again with my two legs and my will to run. 


Let's go! 

You got this! 

You really got this, because you are running 30, 45, 55 minutes and you are doing it with a smile, with pride, with joy!

Monday, August 10, 2015

Succulent Terrarium DIY

*Disclosure: This is a sponsored post, all opinions and images are my own. We received a gift card from Orchard Supply Hardware which facilitated our review of their products and services, however we are loyal customers of our local store.* 

Back in 1974, after my parents got married they began a small business. Four years after, when I was born began the popularity of gardening and landscaping in the city of Los Angeles and both my parents had their own staff to keep up with business. Their love for landscaping was passed onto us, we grew up visiting local plant nurseries and learning to appreciate the beauty of a well landscaped back and front yard.


While in Costa Rica, I took our almost non-existent garden to a lush tropical garden full of herbs, succulents, colorful flowers and palm trees. I love to garden, so when the time came to move back to the Bay Area we knew we wanted  our new home to have a garden for us to care for. 

Since we moved into our new home last Spring, I've been slowly working to getting our garden to where we'd like it to be. One of the major changes for us is the weather, in Costa Rica it rains 6 months out of the year and I mean rain, rain like I'd never seen before. Here, in California we are experiencing one of the worst droughts ever. Which is why it is important to chose plants that are drought tolerant. 

Just a couple of weeks ago, Orchard Supply Hardware {OSH} mailed us a gift card to visit our local store, shop and work on a project of our choice to add to our new home. When we asked for suggestions we were given the following ideas:

-Terrariums Succulent Garden 
-Lanterns Succulent Garden 
-Letters Succulent Garden 

They know me well enough to know how much I love succulents, they're so easy to care for (just water once a week) and they have so many varieties that are simple yet beautiful.


We decided to work on a terrarium. When we arrived at OSH we immediately headed to the succulent area of their gardening department and began looking at all the options they had, between the kids and I we had a lot of ideas going on. Lucky for us Ash and Tina were there to help us from choosing our materials to working on our project with us. 

One of the many perks of shopping and buying your planter and plants at OSH is that their staff can help you plant your purchased plants for you at no additional cost plus they'll include the dirt and help make it look exactly what you had envisioned for it. 

Ash was amazing with our project and explained each step of it as he worked on it. Here are the instructions so that you too can make your own terranium.

Succulent Terrarium Garden:

1.- Choose the container in which you'll have your terranium, may I suggest a glass container so you can enjoy seeing your succulent garden to the fullest. OSH has many sizes and shapes to chose from, we chose a large fish bowl.


2.- Select the decorative rocks you'll be using, OSH has a wide variety of rocks from blue to gray to white to clear ones. It's completely up to you what color you'll be using.


3.- Chose your succulents according to the size of your container  -I should warn you that OSH has so many types of succulents you will take a while to narrow it down to a few-, for example in ours we were able to fit 4 different plants comfortably. If your container is small think one or two small plants.


4.- Clean your container, place some small stones at the bottom to help with watering. On our container it was about 1-2" deep in rocks, about 1/4 of the container's size. Place cactus dirt inside container roughly 3-4" deep, you want to cover roughly 1/2 of the container with the dirt.


5.- Plant each succulent gently, inside the dirt. You can make space for each succulent with your fingers, as gardening tools are too big to use inside the container. 


6.- top off the plants with small river rocks or small stones in your color of choice.


This is what our terrarium looks like inside:


Easy, right? Best part is kids can help make a terranium and care for it. You can use the terranium to decorate inside your home. We use ours as our dining table's centerpiece, it's like having a little piece of nature inside our home. 


We had part of a gift card with a positive balance on it, so we decided to purchase more plants for our garden. 

The house we moved into has a long rectangle shape in-ground planter, that had dirt in it and along the back wall were scattered trees and plants that in all honesty looked like they needed some TLC.  During our visit to OSH we also purchased plants that would add color to our garden as well as seeds of herbs to plant, as I love cooking with fresh cut herbs such as dill, rosemary and basil. 


Would you believe that these plants come in 4 or 6 packs? That made it easier to get more plants and more budget friendly. As you can see our garden is still a work in progress, we would also love to add mulch or river stones around our new flowers and plants. We hope to have our garden ready in a few weeks. For more ideas on how to refresh your garden and home visit your local OSH, I'm sure you will find experts as friendly as Tina and Ash there to help you.